Location
To the south of Van city, the Hoşap valley extends inland from the shores of Lake Van in an easterly direction. The wide and fertile lower section of this valley is now known as the Gürpinar plain but was formerly called Hayots Dzor, the "Valley of the Armenians". The older name is connected to the story of the third millennium BC warrior chieftain Hayk (also transliterated as Haik or Haig), the legendary founder of the Armenian nation. In the legend, first written down by the 5th century historian Moses of Khorene, Hayk arrives in Hayotz Dzor and constructs the castle of Haykaberd (actually the Urartian fortress at Çavuştepe) and later, in the same valley, defeats an invading army from Babylon and kills their king, Bel.
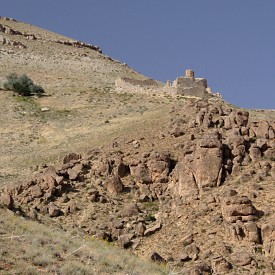
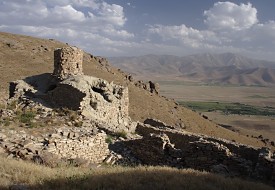
The Gürpinar plain is bounded to the north and the south by mountain ranges. The St. Marinos monastery is located high up on the southern slopes of the hills on the northern side. The monastery can be reached by foot using a rough path that leads upward from Gelberhasan village in the Hoşap valley. There is another trail, now disused, that leads to the monastery from the northwest, from the direction of Edremit. However, the easiest way to reach the monastery is by leaving the main Van to Gürpinar road just after it starts to descend into the Gürpinar valley: stop at the parking spot beside the fountain and then start walking overland towards the west for about 80 minutes. History
The date of the foundation of the St. Marinos monastery is not known, and the crudity of their construction makes the surviving buildings difficult to date. The monastery originally had the alternative name of Srkhouvank. It was founded to house a community of nuns and was dedicated to the female saints Marinos and Theodora ¹. It had an active scriptorium during the second half of the 16th century: in Yerevan's Matenadaran museum there exist five manuscripts that are known to have originated in the convent.
An earthquake in 1648 destroyed many churches in the Lake Van region and probably affected the convent. However, there are no records of it being restored in the aftermath of that earthquake. Thierry ² postulated that the restoration may have taken place later, at the start of the 18th century, and that the church cannot be earlier than the 17th century. During the 19th century it occasionally served as a residence of the Catholicos of Aght'amar. It was also a much-frequented place of pilgrimage for childless women. A modest tomb, identified as being that of Saint Marinos, was located at some distance from the convent (though Saint Marinos was actually buried in Lebanon, and her relics were later taken to Constantinople and then looted and taken to Venice). Description
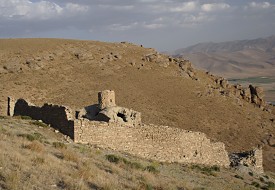
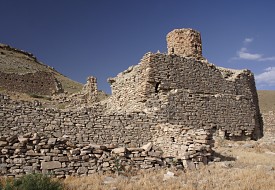
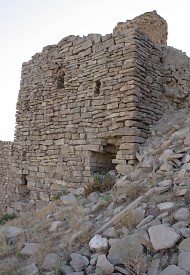
The convent consisted of a single church and various monastic buildings, the whole surrounded by a defensive wall.
The Church
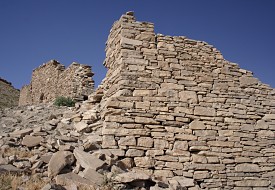
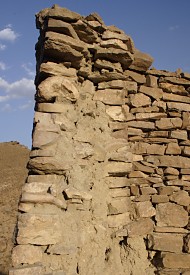
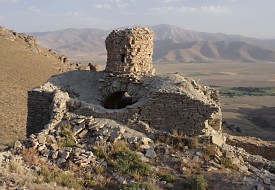
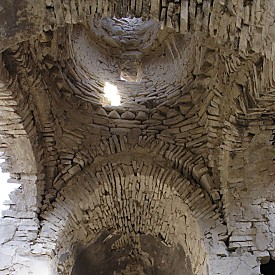
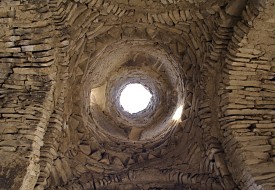
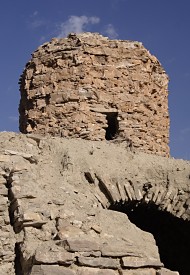
The church, "B" on the plan, has a "domed hall" plan. Above the central square is a tall drum with a dome whose apex has collapsed. The drum is cylindrical on the inside, octagonal on the outside, and is pierced by four windows. One of the windows has a reused gravestone as its lintel. The exterior of the drum appears to have been originally faced with cut stone blocks that have now been robbed-out. The rest of the church had a flat, earthen roof.
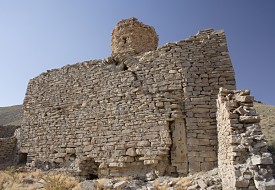
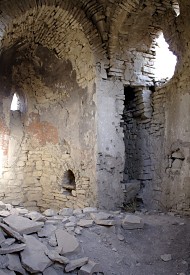
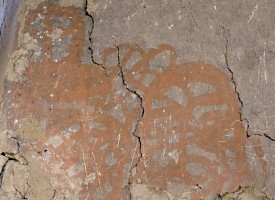
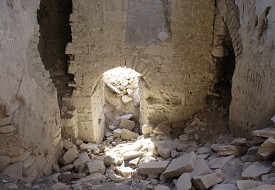
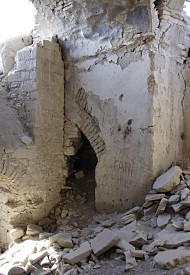
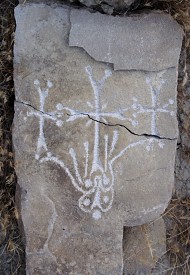
The apse is particularly deep and is lit by a single window. This window is quite large for the period - probably a wider than usual aperture was acceptable because on the outside the window is located high above the ground level. There is a small and crudely shaped niche in the southern side of the apse. The apse, along with most of the interior of the church, has originally been plastered. On surviving plaster on both sides of the apse window there are a series markings (see photograph 16). They are little more than very crude daubs in a red paint, and appear to depict a series of crosses inside circles, often overlapping each other. It is unclear whether they are original, or are just graffiti that post-dates the abandonment of the monastery. The apse is flanked by long, narrow side chambers on two levels, with each chamber being lit by a small window in the east façade. At some point the domed-hall plan was altered and the two bays that opened onto the western arm were filled in (see photograph 18). This appears to have coincided with a reconstruction of the entire west wall of the church. The current off-axis entrance, and the window above it, is not original. This alteration and reconstruction may have been as a result of the 1648 earthquake. Thierry noted a blocked-up doorway in the southern bay, but it is no longer visible due to fallen masonry. The vaults of the filled-in bays were constructed using mud bricks. On the south façade of the church, loss of masonry has revealed the southeast corner of an earlier wall - a wall made of mud brick (see photograph 9). This corner is located about one metre in from the present southeast corner. Either the entire eastern part of the church has been lengthened at some point in time, or the church originally had shorter side chambers and an apse that protruded out from the line of the east façade. Again, this alteration may have been as a result of the 1648 earthquake. Other Buildings
To the west of the church is a rectangular chamber, room "C" on the plan, which is partially divided by a crudely-built wall. This room may have served as a jamatoun and was probably originally roofed with wood. To the north of this chamber is a passageway, "D", that gave access to a row of three rooms that are now roofless. Thierry noted that room "F" had what appeared to be an oven in its east wall. He postulated that room "F" may have served as the kitchen and room "E", which has several niches in its walls, might have been the refectory. The possible oven in room "F" is no longer visible, nor is the wall with steps that bounded area "G" - an area Thierry called a small garden. Thierry included the area marked "H" as part of that garden. However, there is a row of postholes along the length of the inner face of the north wall, indicating that a structure of some sort must have been located in area "H". At the southern side of the site are four enclosed areas, marked "I" on the plan. The walls of these enclosures are much cruder than elsewhere in the monastery: some or all of them may be sheepfolds that date from after the monastery's abandonment.
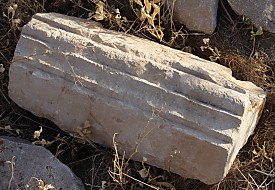
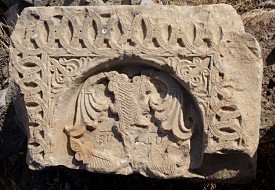
To the east and the northeast of the enclosure wall are the remains of a graveyard. Treasure hunters have disturbed most of the graves. The surviving gravestones all have very simple designs, without inscriptions. There are several more simple gravestones lying in area "I" at the northern end of the enclosure, but they are probably not in their original location. On my first visit to the monastery I noticed a fragment of an ornate khatchkar (see photograph 20) lying near the southwestern end of the enclosure wall. Treasure hunters had probably dug it up. A year later it had vanished. At a short distance to the south-west of the monastery, underneath some small trees, there is a spring. The water is now carried away via a pipe to Gelberhasan village but drinking water can still be obtained from it by lifting the slab that covers the start of the pipe. West of this, but much further away from the monastery, is a small, ruined, single-nave chapel. It is probably the structure that was known as the tomb of St. Marinos.
NOTES:
1. The hagiographies of the saints Marinos and Theodora represent stories of female saints masquerading as men. Saint Marinos, also know as Marina the Monk or Marina the Syrian, lived in north Lebanon in the 5th century. Her mother died while Marina was young. This made her father decide to renounce the world and live in the Monastery of Qannoubine. He took his daughter with him, whom he disguised by dressing her like a man. As a monk she was known by the name Marinos. After her father's death she continued to live in the monastery, still disguised as a man. One day she was obliged to spend the night at the house of a friend of the monks named Paphnotius. Later, Paphnotius discovered that his daughter had fallen pregnant and demanded to know the name of the perpetrator. His daughter told him that Marinos the monk had raped her the night he spent in their house. When the head of the monastery confronted Marina with the accusation she said nothing to defend himself and did not reveal the anatomical proof of her innocence. Marina's silence was considered to be an admission of guilt and she was expelled from the monastery. However, she remained at the door of the monastery praying and crying, living off the leftovers of the monks' food. When the child, a boy, was born he was brought to the monastery and given to Marina to raise. Depending on the account, this situation continued for either four years or for over 20 years. Eventually Marina was allowed to re-enter the monastery under very strict conditions. It was only after her death that the monks discovered that the monk Marinos was a woman and not a man. Saint Theodora of Alexandria also lived in the 5th century. After committing adultery, she resolved to enter a monastery in order to purify herself with prayer and penance. She left her husband secretly and, dressing herself in male clothing and calling herself Theodore, she entered a monastery. One day, after many years in the monastery, the saint was sent to Alexandria to buy provisions and stayed at the guesthouse of a monastery along the route. A woman who was staying in the same guesthouse became pregnant, and accused Theodora of fathering the child. Theodora denied the allegation, and was for a while believed on account of the purity and holiness of her life at the monastery. However, after the woman gave birth and brought the infant to the monastery, the accusations proved too strong and Theodora was expelled in disgrace. She then lived with the child in a simple hut not far from the monastery, spending seven years in banishment before being allowed to return to the monastery. Like Saint Marinos, it was only after her death that it was discovered she was a woman. 2. Thierry, J.M., Monastères Arméniens du Vaspurakan V in Revue des Études Arméniennes, volume 8, 1971, pages 218-221. The plan of the monastery used on this page is taken from this article, but with some corrections and modifications.
LINKS: |
|
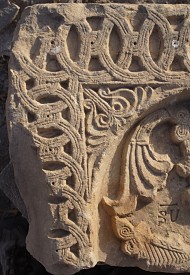 21. Close-up of the same khatchkar |
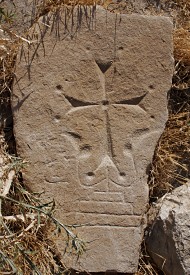 22. A gravestone from the cemetery |
 23. A gravestone from the cemetery |